Simple command to update time in Windows server
Simple command to update time in Windows server
Simple command to update time in Windows server

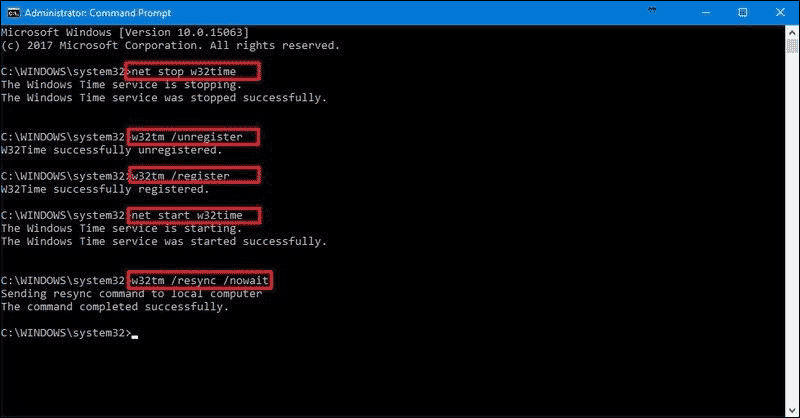
To update the time on a Windows Server, you can use the net time command from the Command Prompt with administrative privileges. Here’s how you can do it:
- Open Command Prompt as Administrator:
- Press
Win + Xand select “Command Prompt (Admin)” or “Windows Terminal (Admin)”. - If using Windows Terminal, make sure to select the Command Prompt option if
cmdis not the default terminal.
- Press
- Check Current Time Source (Optional):
- Before updating the time, you may want to check which time source your server is currently using:
bash
w32tm /query /status
Look for the “Source” line under “Leap Indicator”.
- Before updating the time, you may want to check which time source your server is currently using:
- Update Time Using
net timeCommand:- To update the time from a specified time server (e.g., time.windows.com), use the following command:
bash
net time /set /yes
This command will synchronize the time with the time server specified in the registry.
- To update the time from a specified time server (e.g., time.windows.com), use the following command:
- Verify the Time After Update:
- To verify that the time has been updated, you can check the system clock or run the
w32tm /query /statuscommand again to see the current time source and synchronization status.
- To verify that the time has been updated, you can check the system clock or run the
- Additional Notes:
- Ensure your server has connectivity to the specified time server or adjust the command accordingly if using a different time source.
- If your server is part of a domain, time synchronization may be managed by Active Directory and Group Policy, in which case, using
net timemight not be necessary or allowed due to policy settings.
By following these steps, you can quickly update the time on a Windows Server using the net time command.